

To continue with article you will need a AWS account ( there is a free-tier account) , then visit the Beanstalk service page, https://console.aws.amazon.com/elasticbeanstalk this where our focus will be. We will be deploying a Spring boot web application, though there are services for other platforms such as .NET, PHP, Node.js, Python, Ruby, Go, etc More: https://docs.aws.amazon.com/elasticbeanstalk/latest/dg/GettingStarted.CreateApp.html
NB: You might need permissions if you're using a company aws account
When you've signed-in onto your AWS beanstalk console, click the Create New Application to get started and fill the pop form with your app name and it's description.

This will create an app instance but without an environment, so you create one by clicking on the Create one now

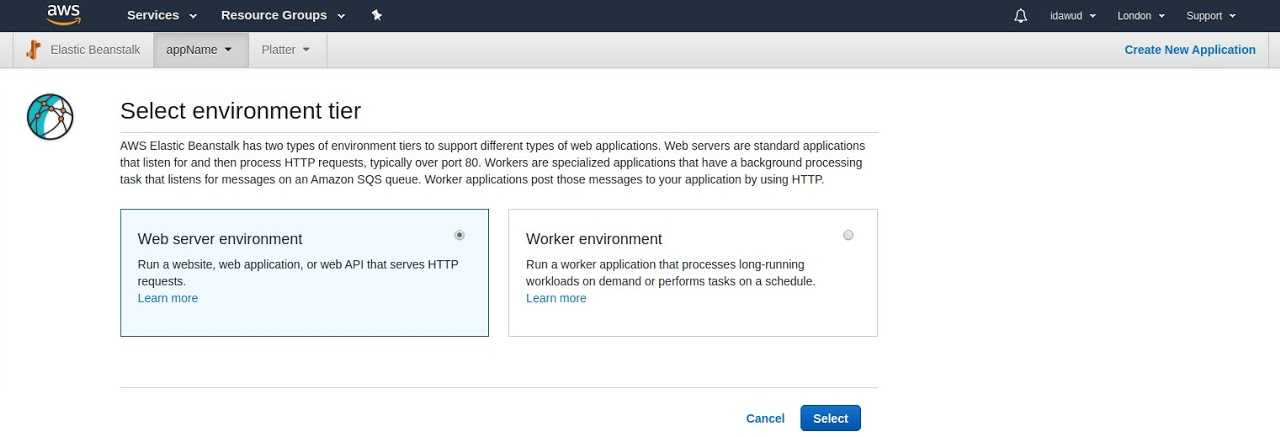
The next page ask for the environment tier either Web server or Worker, in our case what we want is a Web server
The next page ask for the type Web server environment we want to create and the domain to route through in our case we'll leave it as default. To start with, we are going to launch the app with the AWS sample project, but we'll setup a CI/CD later to auto deploy.
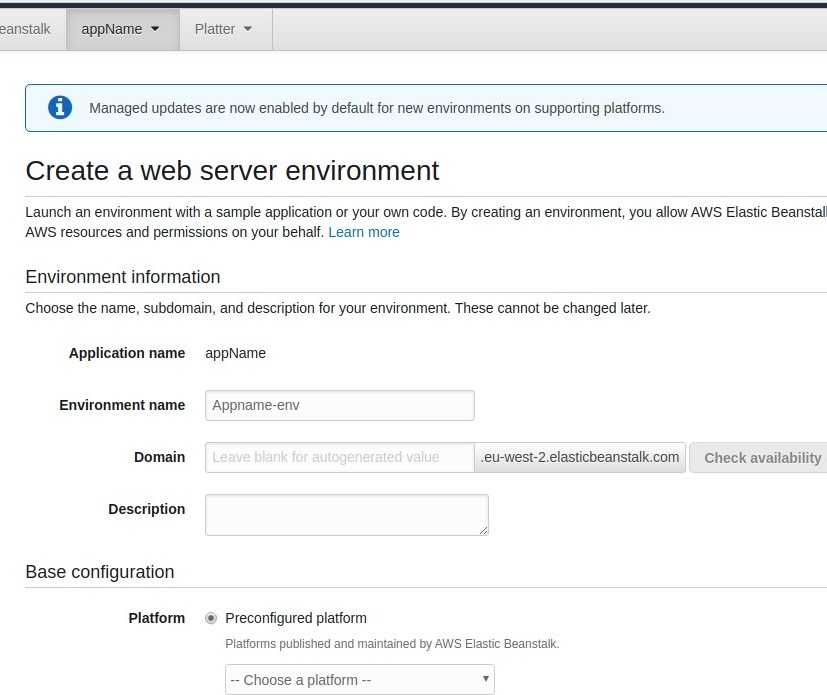 Enter env name and leave the Domain Default
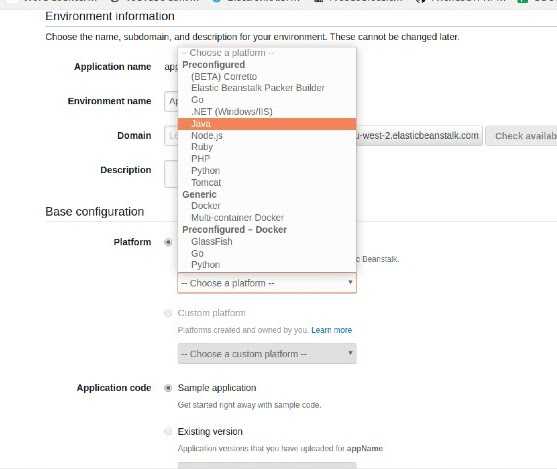 Select Platform as Java and Select Sample application
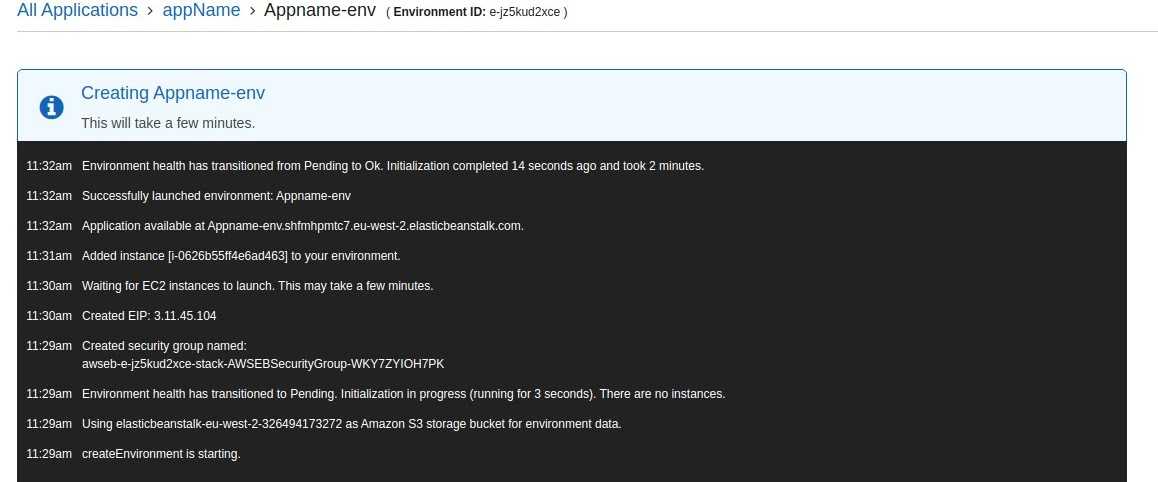
After clicking the Create environment button, it should create one for you as below and then show your the env dashboard which has the URL for your application in the second image below.

If everything goes well, your URL should have a sample page like this. NB: The page may change at the time of your reading

HURRAY! You've got an application deployed on aws
We're not done yet!
We have to setup a code pipeline for Continuous Integration and Continuous Deployment using AWS CodePipeline
We start by creating on the Create pipeline button to get started
 Fill out the name you want to give the pipeline and leave everything default
 Select
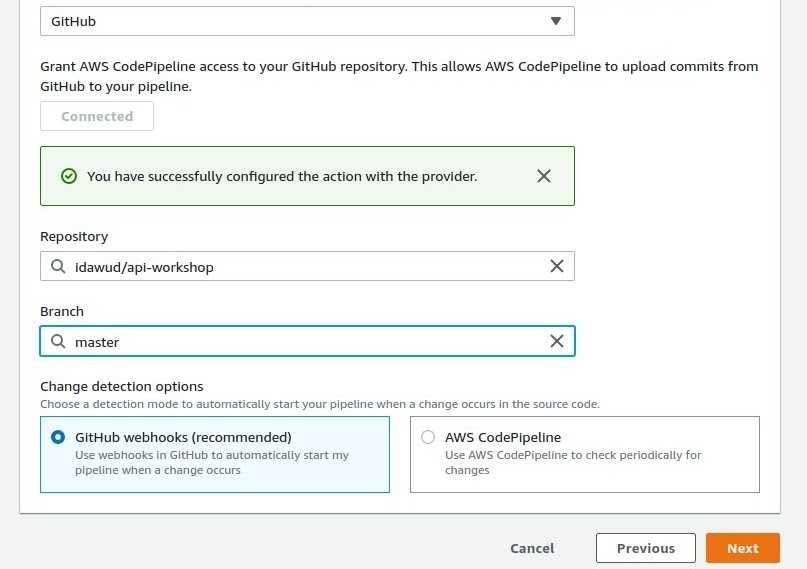
 GitHub from the code source which will ask you to authenticate GitHub with OAuth. Select the Repository and the Branch you want to build. Leave any other stuffs default and click Next
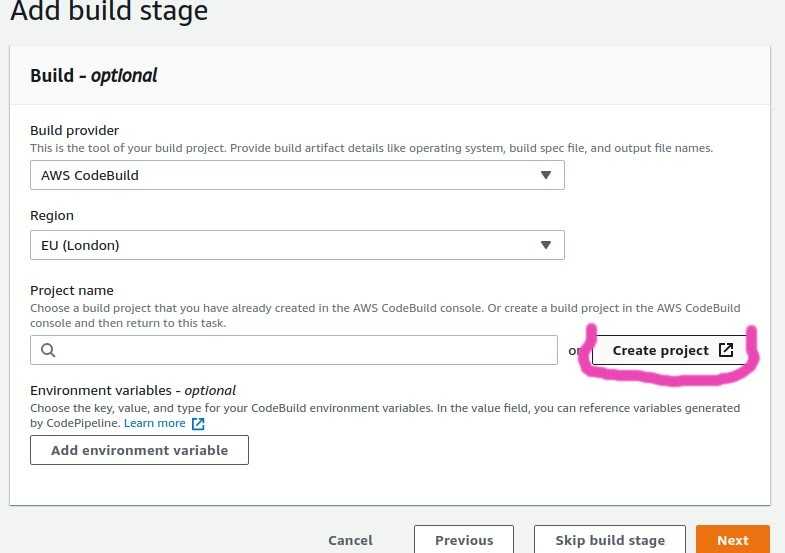 Select the CodeBuild provider and Click The
 create project which will redirect you to the codebuild page
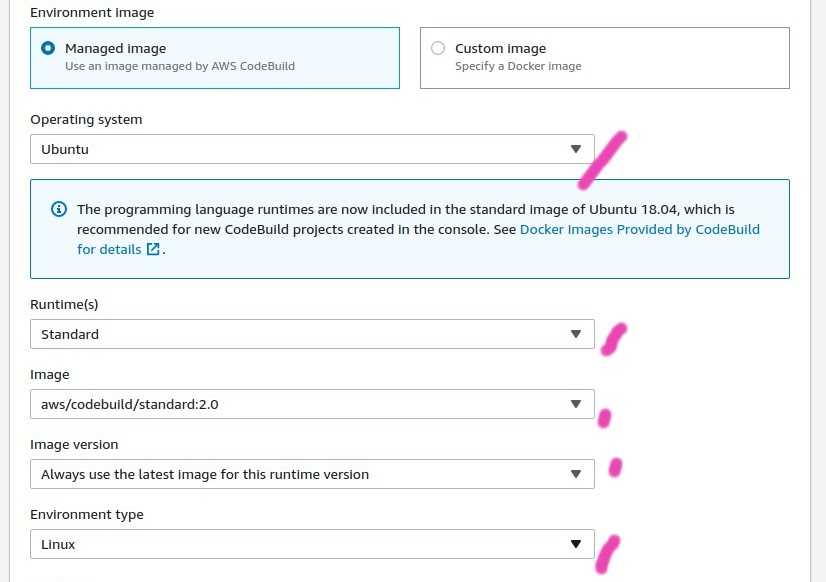 Leave everything to default, except these marked fields above
Click on the Next button and select Elastic Beanstalk in the deployment section followed by the application name and the application environment. That's all. The pipeline will try to clone from the source, build and deploy, but it will fail at the build stage because it's lacking a buildspec file which we selected to be used for build. So we have to include a buildspec.yml file with the content below in the root directory of our project and push code to github. The change will be picked by your pipeline and it will be built by running your test, if they pass then your application will be bundled into a jar file and deployed for you automatically.
NB: This buildspec is for a spring boot application with a gradle build tool. The build instruction will change based on the build too you're using .
Remember: Change the appname to your application name settings.gradle file and the 0.0.1-SNAPSHOT to the version specified in your build.gradle file
phases:
  install:
    runtime-versions:
      java: openjdk11
  pre_build:
    commands:
      - echo Run Unit tests on `date`
      - ./gradlew test
  build:
    commands:
      - echo Build started on `date`
      - ./gradlew bootJar
  post_build:
    commands:
      - echo Build completed on `date`
      - mv build/libs/appname-0.0.1-SNAPSHOT.jar application.jar
artifacts:
  files:
    - application.jar````


HURRAY! You've now setup CI/CD for your application on aws
No comments?
There are intentionally no comments on this site. Enjoy! If you found any errors in this article, please feel free to edit on GitHub.