

In this hands-on article, you will launch a virtual server in the cloud within a secure network. You will also manage additional storage options for your server.
Prerequisites:
- AWS Account
By the end of this article, you will be able to:
- Launch a secure EC2 (Elastic Cloud Compute) instance within a VPC (Virtual Private Cloud)
- Manage an EBS volume
Steps:
-
Access VPC service from AWS Management Console
-
On the
AWS Management Consolepage, typevpcin theFind Servicesbox and then selectVPC.
-
Click the
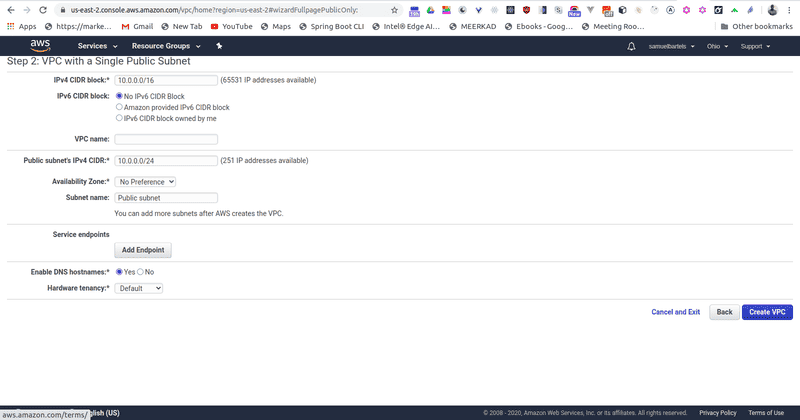
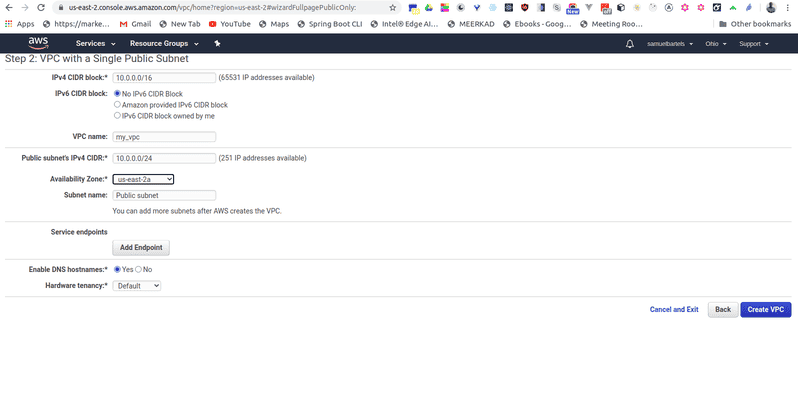
Launch VPC Wizardbutton and selectVPC with a Single Public Subnet. Important: In theVPC Nametext box, enter a name for the VPC, and then select the first AZ from the Availability Zone dropdown. Leave everything else as the defaults.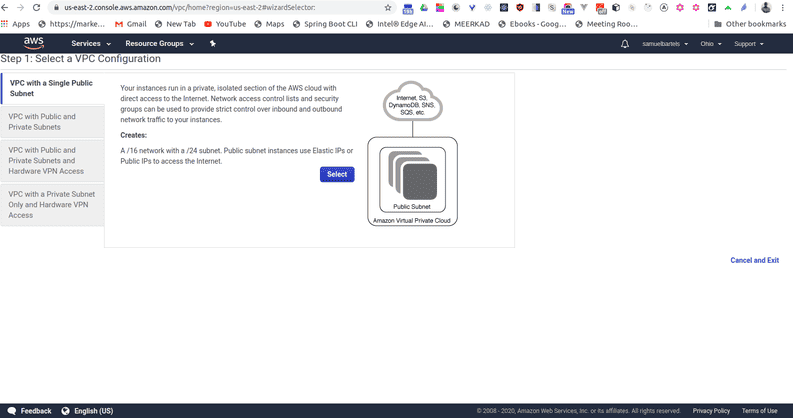
-
Select
Create VPCbutton. -
You should see the
VPC Successfully Createdpage, click the OK button in the far right. Important: You should see a table that lists all of the VPCs, make a note of the one just created.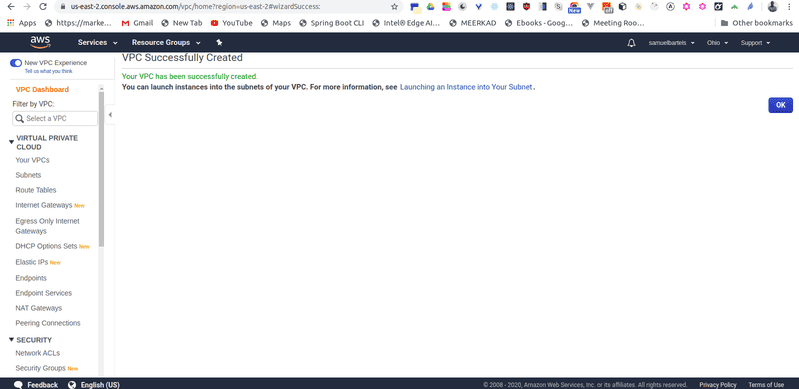
-
-
Launch an EC2 instance
-
Navigate to the EC2 console page, by clicking on
Servicesin the upper left-hand menu. TypeEC2in the text box and click onEC2found in the search results.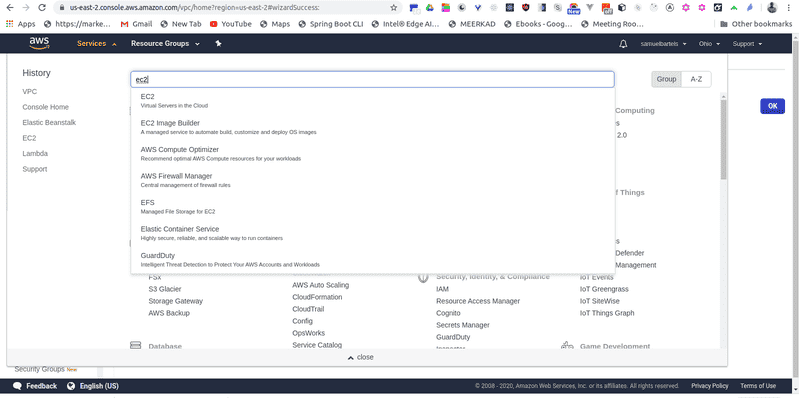
-
On the EC2 Dashboard page, click on
Instancesin the left-hand navigation.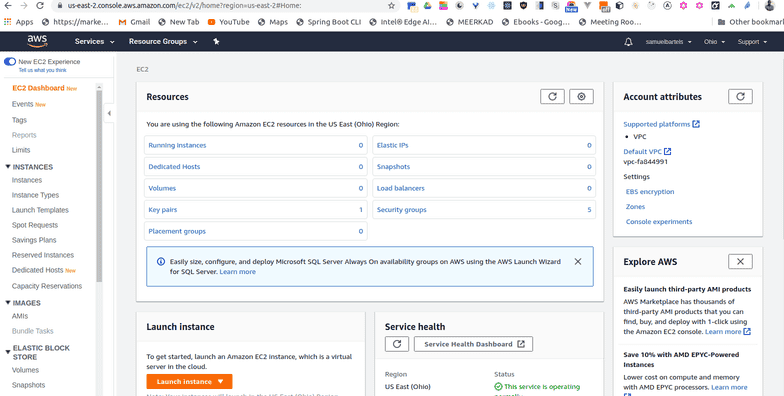
-
Click
Launch Instance.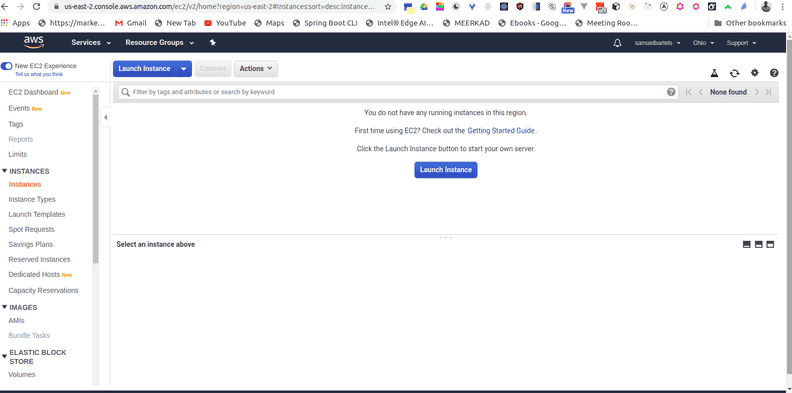
-
Select the
Amazon Linux 2 AMI (HVM), SSD Volume Type Amazon Machine Image (AMI). Important: You are free to choose a different AMI, but to avoid excessive charges, pick one that says,Free Tier Eligible.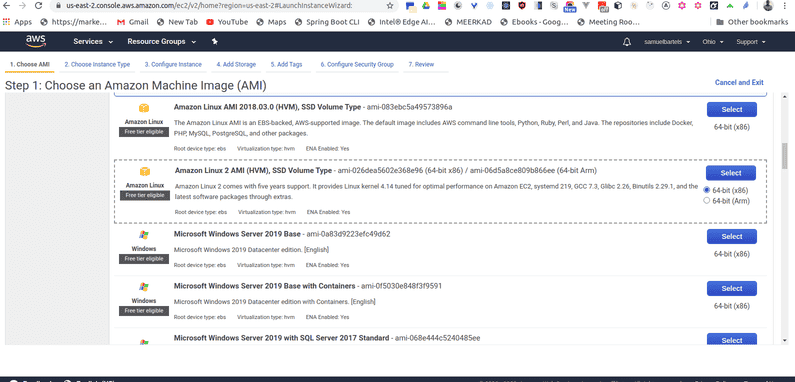
-
For the
Instance Type, select the free-tier instance type oft2.micro.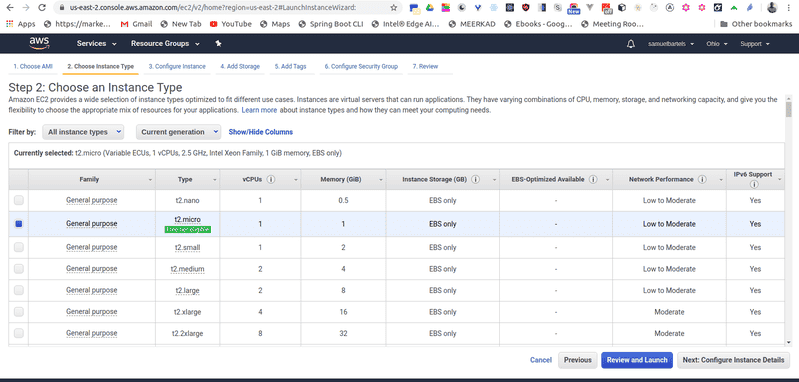
-
Click on
Next: Configure Instance Details.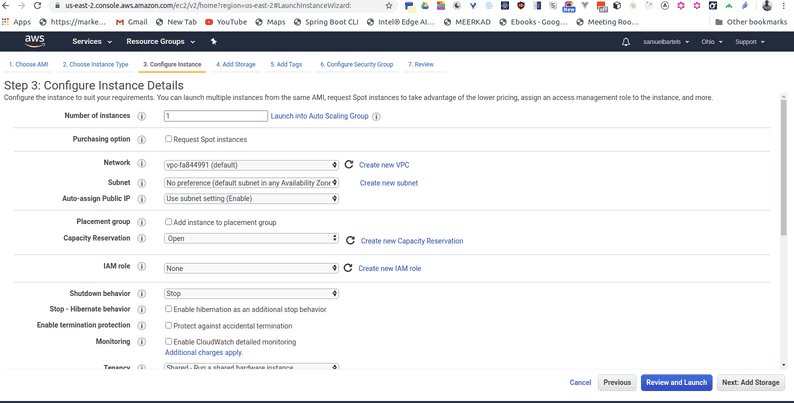
-
Enter the 1 for the
Number of Instances.
-
For Purchasing option, leave unchecked.
-
For Network, select the VPC that was created in the previous step, and then select the subnet in to which to launch the instance.
-
-
Attach an EBS volume
-
Click on
Next: Add Storageto attach an EBS volume. Important: Here we already see there is a root volume (or device) attached to your instance, this is an EBS volume. We are going to add additional storage.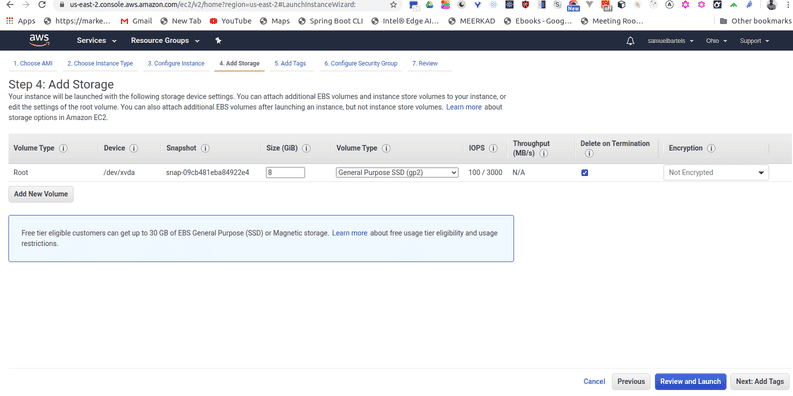
-
To attach additional storage, click on
Add New Volume. -
Select
Delete on Terminationand keep the other default settings.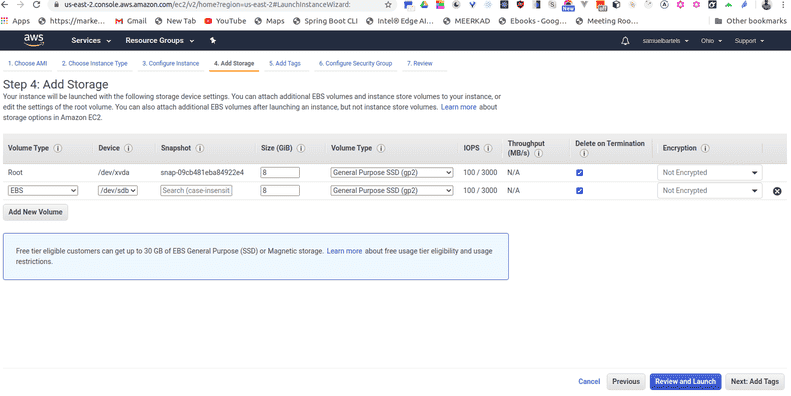
-
Click
Review and Launch.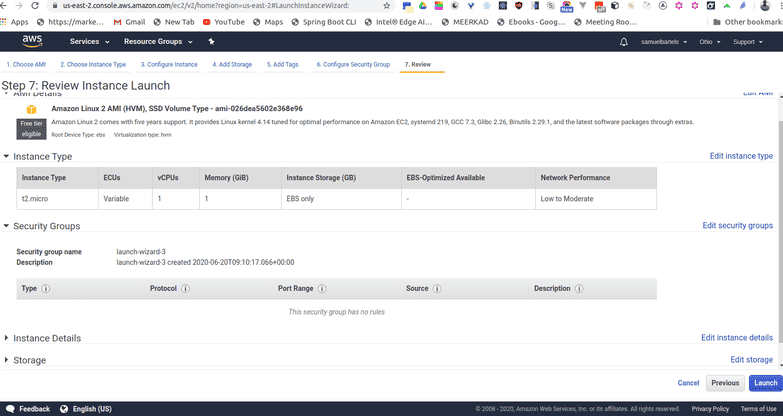
-
Click
Launch. -
Generate and download a new key pair and then click
Launch Instances. Important: This will allow you to SSH into your instance from your local machine. This is a one-time process, so generate and download the new key pair now.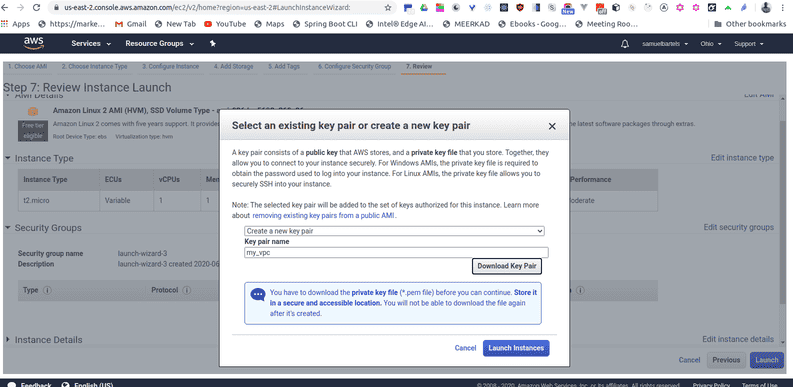
-
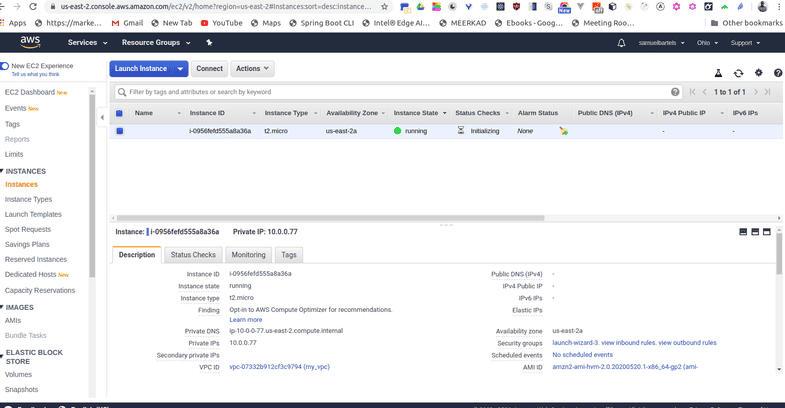
The launch will take a couple of minutes, select
View Instancesduring the wait.
-
Check the instance state, it should say running.
-
Congratulations! You’ve launched your first virtual server in the cloud.
-
Cleanup & Disable EC2 Instance To avoid recurring charges for leaving an instance running, let’s disable the EC2 instance and terminate the VPC
-
From the EC2 Dashboard, select the instance just created, click
Actions, thenInstance State, and then selectTerminate. -
From the VPC Dashboard, select the VPC just created, click
Actions, thenDelete VPC.
-
No comments?
There are intentionally no comments on this site. Enjoy! If you found any errors in this article, please feel free to edit on GitHub.